Showing posts with label Katia Jaipur. Show all posts

Saturday, 11 June 2016

I just love colourful crochet shawls!


Hello, my dear blog friends,


Good to see you back here! And a hearty welcome to my newest followers, you are very welcome and I value your input and comments, and appreciate your time!

Today I want to do a review post, one that looks back at some of my previous makes.

As you can see from the title, I just love colourful shawls. You might have noticed this before. It just struck me when I wrote my last two posts, and I warned you to wear your sunglasses!!!

Afterwards I thought to myself, wouldn't it be fun, if I took a look at some of my shawls and took some photos. So that is what I did! And I really enjoyed it, looking at all that colour together.

And the naughty cats proceeded to walk, no run and skid, across my shawls which meant I had to lay them all out properly once again.

So here they are, some of my colourful shawls, most of them are for the summer. Enjoy!


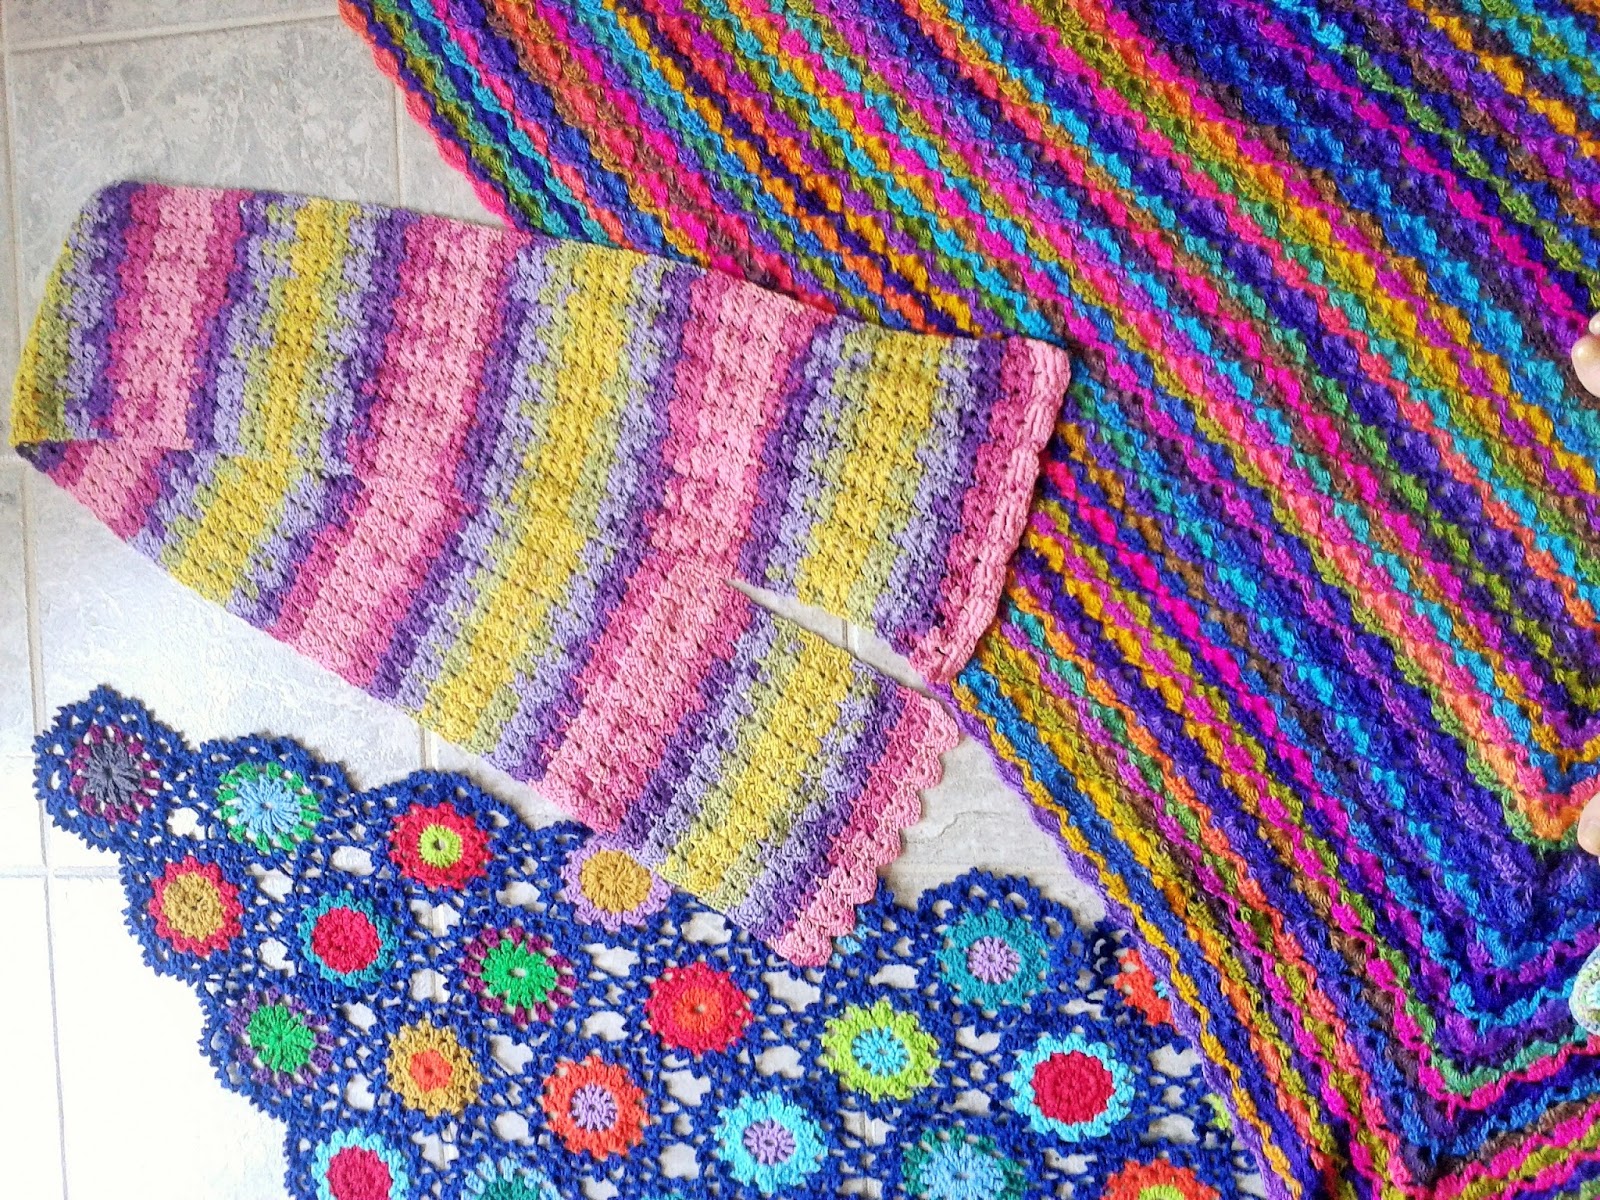
Scheepjes CAL2015: Flight of Fancy, my own Rainbow Circle Shawl, a small neckerchief South Bay Shawlette, All at Sea Shawl, Elise Shawl, Veritas Triangle Shawl, Minty Green Shawl


Here is a striped Crocodile Stitch Scarf I made some time ago (love how the stripes match up)

My Noro Lion's Foot Stitch Scarf in the middle

Some Skinny Scarves made from Katia Yarn, made with a 2mm hook

Here you can see that my colourful South Bay Shawl really steals the show, it is huge!

If you want to find out more about any of these shawls, just click on the right side bar on the tag called 'Shawl' and it will bring up all the posts that I tagged like that!

Obviously I forgot some, like the Tahiti Shawl I made last summer, it must be somewhere else...

And of course there are the two woollen South Bay Shawls which are draped over my chair where I sit, I didn't include them in the picture because there wouldn't have been enough floor space!

It makes me very happy to think that I got all these shawls waiting for me, that I can pick and choose which one to wear, according to my fancy! And to know, that they are unique, that I made them myself, also fills me with pleasure and joy!

I think this is something we all got in common, when we make things for ourselves and others - it brings joy to the maker and to the wearer.


Hope you liked this post, feel free to leave your comments, it's always great to hear from you!

Have a nice weekend!

Wednesday, 19 August 2015

My Rustic lace square Cardigan is finished!

Hello again,

Thanks for all your lovely reactions to my last blog post, glad you enjoyed the various projects I showed you!

As I hinted last time, there is another project that has kept me very busy indeed. Thankfully I finished it almost two weeks ago and now I will take the time to write about it.

Can you guess what it is? (the hint is in the header!)


My new Rusticlacesquare Cardigan is finished!!!


My finished project is made of 70x rusticlacesquares, each about 10cm square.

One small rusticlacesquare

These had to be crocheted together , you can see some details here.


Attaching the crochet squares to one another


Here you can see my work laid out on the floor. My feet are there for scale. It was quite a job to lay out the squares so they would look interesting, i.e. different colour schemes next to one another.

I used lot of Katia Jaipur fine cotton yarn an a 2mm hook. I hunted down as many different colourways as possible, I think there were at least 10 different shades!!!

I really love this yarn, it's so nice to work with.

Is it a blanket? No, it's a cardigan!!
 
Choosing some nice buttons to add

Here is the cardigan before the buttons were added. The finished garment is still very lightweight, due to the fine yarn.


Almost done!
And here are some modelling shots.... (courtesy of my son when he visited)


I think all in all, I worked on it for about 10 weeks. Before I started, I knew I wanted to make a garment. On instagram I saw plenty of blankets made from these squares. However, since my squares were only 10cm (compared to the 20-25cm) of some of my fellow crocheters, a blanket would have taken forever to make.

For a long time I had dreamed of a jacket or cardigan made from crochet squares.
Finally I made my own!!

I definitely put all my heart into this project and I feel it is the most challenging and accomplished thing that I crocheted so far. It really dominated my summer!

I'm thrilled that I tried lace crochet, and that I enjoyed I so much.

Well, I hope you enjoyed this post, you can find all previous posts about the rusticlacesquare by clicking on the tags in the sidebar.

(Also I seemed to have re-published my first post from June 2015 accidentally, so take no notice. Of course you are welcome to read it again, if you want to).


I look forward to reading you comments.... so please leave them after the beep! ;)

Oh, and this morning I finished something else, so there will be another post very soon!!!

Bye for now!!!


New Crochet Crush - Rustic Lace Square (Crochet Motif)

Hello my dear Blogfriends,

(post first published on 01.06.15)

If you are on Instagram, you might have already noticed that there has been a surge in people trying to crochet this pattern.

You can find it  on pinterest (Print out the diagram on the best quality setting)
and here on instagram!

It is called:

The Rustic Lace Square

So pretty, don't you think? It was love at first sight, but I had to postpone trying it out until a number of other things were completed (especially the baby blanket).

I love playing with crochet, trying new things, and also playing with yarn, see what works and what doesn't.

There is only a diagram, no written instructions. Most people make them in multiple colours, I decided to use variegated yarns.

This time I used Katia Jaipur cotton yarn (50g = 280m, recommended hook: 1.75, I used a 2mm hook).

My squares measure about 10cm square.

Rustic Lace Square
Rustic Lace Square Diagram
the first two squares and the diagram

Crocheting 3 squares at the same time with 3 different colourways


7 squares on 29.05.15


Square 8 - 30.05.15
Square 9 - 31.05.15
The Story so far

Mine are turning out really lacy and dainty! I wonder what they would look like with thicker Cotton yarn? I have seen so many beautiful combinations.

What do you think? Do you like the Rustic Lace Square? I urge you to give it a go and also check online some of the wonderful images of other people's work!

Here are some nice blogposts to check out:

http://marrose-ccc.com/2015/04/22/the-rustic-lace-square/

http://pigstails.blogspot.be/2014/12/flower-power.html

http://hellohart.com/2015/05/01/rusticlacesquare-blanket-for-christi/

These are all about this special square, but please have a read around these sites, they are so packed with amazing crochet information and inspiration! Thank you, ladies (Marianne, Magda and Cornel) for such lovely blogs!


Just one more for the road! Square 10 on 01.06.15


As always, please let me have your comments, I'm looking forward to reading them!
Don't be shy, now!!!

Thursday, 2 October 2014

Woodland Finds - Funky Toadstools and Crochet Stones plus Plummy Cake

Hello my blog friends!

It seems you all enjoyed coming along on the virtual version of my walk in the woods!
Thanks so much for all your lovely comments, it makes me happy to read them all!

Making Funky Toadstools when you can't get to sleep

Yesterday I spent a lot of my time travelling (thankfully the Harlequin Blanket and the Shrug both benefitted from it), but it also meant I was very tired late in the evening.

But for some reason I couldn't get to sleep, so after lying there for a while, I got up again and made myself comfortable at the table. I decided to let creativity take it's own course and have a go just playing with yarn! I was still thinking about my lovely walk and decided I would try to make my own toadstool - I ended up with 3 even! This is the result.

Funky Toadstools
Recently I had seen some knitted versions here on Lisanne's blog (which is always brimming with lots of cool ideas, I don't know how she does it!!!). Knitted Toadstools - the pattern is apparently in this book.

Whenever I stay up during the night like this, I make a point of not turning the computer on. This stops distracting me and I can just make something until my eyes feel tired again and I know I will get to sleep easily enough!

So I began crocheting 4 chains with white cotton yarn and started on the stem of the first toadstool, crocheting in the round and adding 2 extra stitches along the way, then I did some trebles representing the gills, doubling the stitches to 12. Attaching the dark red Cotton from Rico I continued in the round, increasing stitches regularly and then later decreasing. I had left a long tail of the white cotton and used this to add the white spots before closing up completely with red. Likewise, I added some stuffing during this process which helped with the shaping.  Finished size: 3.5cm tall with 2.8cm diameter! Tiny and cute!

My next toadstool was to become even more funky as I reversed the 2 colours and added a more pointy shape! Finished size: 5cm tall and 3cm diameter.

The last one took the longest, because it was also the biggest, measuring about 7cm tall and 6cm diameter.

This time I crocheted the white stem first with about 10 stitches in the round. Then I fashioned the top, beginning at the centre with a magic ring and 4 stitches, increasing more and more each round. As I approached the last 3-4 rows towards the edge, I deliberately increased and on occasion, decreased, in a more random fashion. This resulted in a much more organic shape which was not completely round!

Then I worked the underside with the gills, decreasing until I had also about 10 stitches left to match my stem. I added the white spots by sewing with a double strand of white cotton, added stuffing and sewed the stem to the top. I squeezed the toadstool into shape until I was happy with it! (If you wanted to be precise, you might insist on doing the gills in white, I did mine in red and call it artistic licence!!!)

If this inspires you, then why not have a go yourself? The toadstools do not need to look perfectly round and even, in fact the more unusual, the more original! A nice way to practice crocheting in the round, though it does get easier if you use more stitches or thicker yarn! Use your own imagination!!!


My fresh harvest!!!
This morning when I saw my Surprise Night Project it made me smile!

Crochet Pebbles

I had collected a handful of nice pebbles on my walk as well. To all my British readers I say this: it might be much easier to find perfect pebbles if you have access to a nice beach somewhere instead of looking for them on your woodland walks! :)

Pebbles from my walk
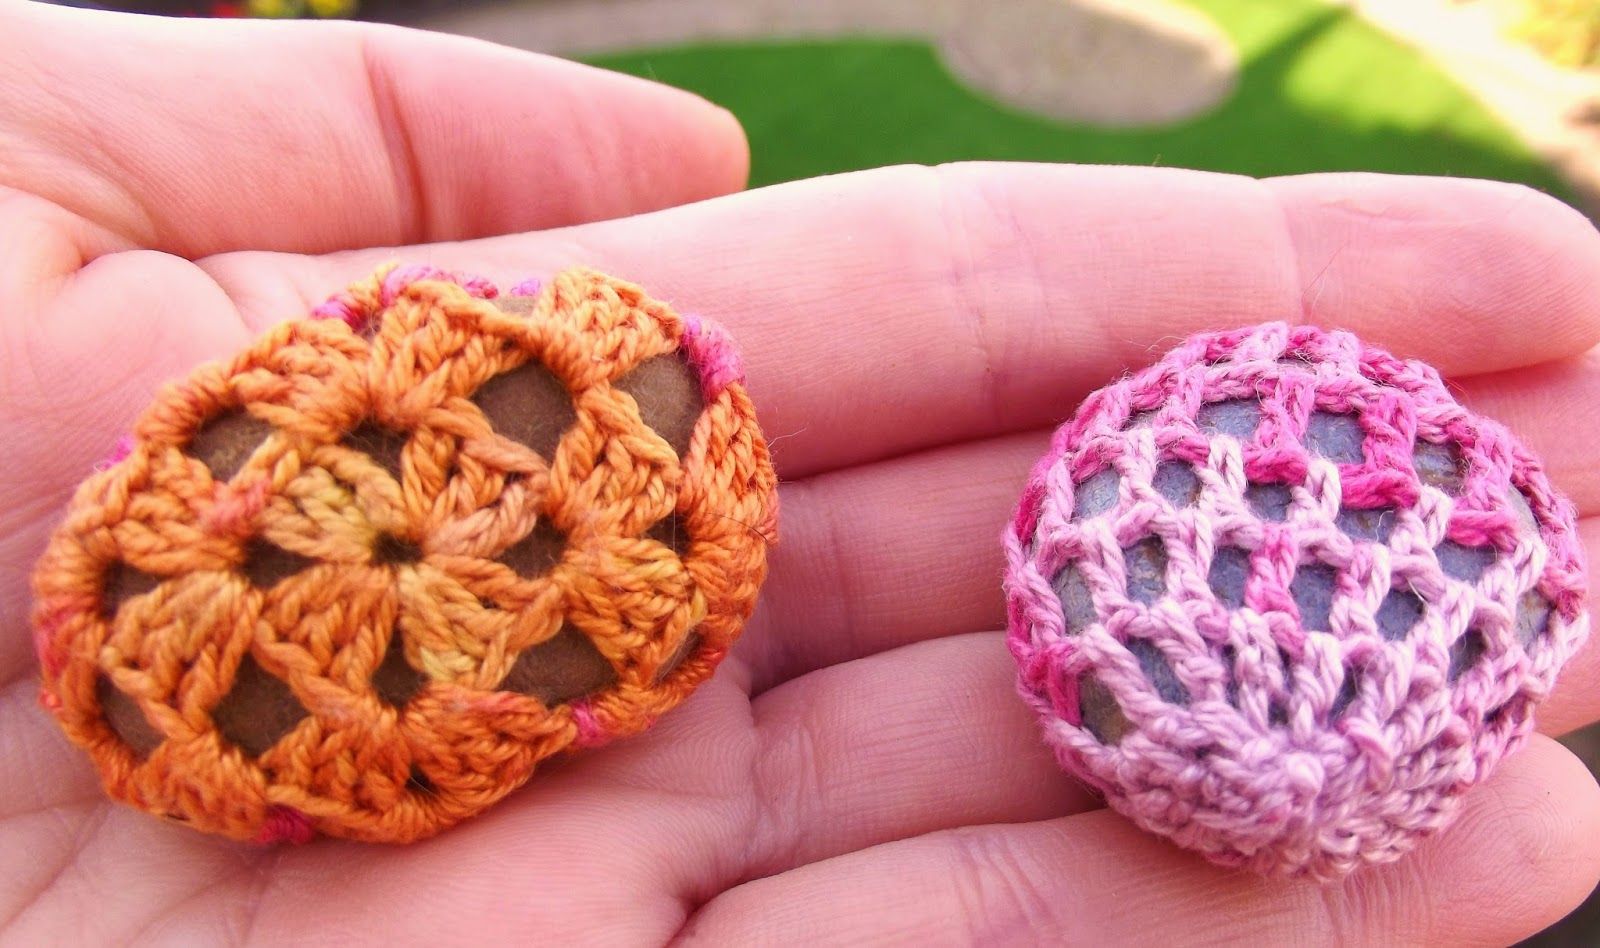
I always wanted to try to crochet around a pebble, so I used some extra fine Katia Jaipur cotton with a 2mm hook and did some granny stitches on one, and some simple loop or mesh stitches on the second pebble. It gets a bit tricky once you have to leave the pebble in place and continue crocheting. These pebbles only measure 3.5cm and 4cm each - they were the smallest ones from my collection.

This was a fun way of doodling with yarn, just seeing where it leads to!

My finished Crochet pebbles made with Katia Jaipur
Lovely effect of the yarn
Granny square stitch versus mesh stitch
Happy Harvest!
Here you can see the combined results of the two little projects plus an earlier little fine Granny Square Doily I had made with the same yarn, showing off the colour effect beautifully!

After that, all I wanted to do is bake a quick cake or tart! I used a few plums which I sliced and placed on top of a layer of Mascarpone cheese spread onto some ready made shortcrust pastry . Sprinkled with plenty of Cinnamon and some Vanilla flavouring! I didn't add sugar, because I like it that way! Baked in the oven as two halves (since we have a very small oven) and voila! Some yummy Plummy cake! (I sometimes vary this simple recipe by using puff pastry instead which also works well. You could use other fruit, too!) It tastes delicious! Of course you can make your own pastry (and some of you would say, grow your own plums even - and I applaud you certainly for that!), but for me this was a quick way to produce something fun and edible without worrying too much about the ins and the outs of things!

PS: Random Health Warning: Do not attempt to add Funky Toadstools and Crochet Stones to your own Plummy Cake - these projects are best enjoyed separately!!! ;D

Some quick Plummy Cake
Are you enjoying the simple things? I do hope so! Not everything has to be difficult or to take a long time to produce something you love doing and that makes you happy in the process!

Have a lovely weekend! I am looking forward to it very much since my family from Germany is coming to visit, so there will be less time for blogs! (I'm hoping to catch up afterwards and look forward to find out what everyone has been up to!)

What do you think of my little quirky makes? Did they make you smile a little? Please leave me a message, I love reading them!