Hello my friends,
Finally I get a chance for another post! Enjoy the photos, there are plenty! I've been rather busy lately! But then I'm sure, all of you have as well. Isn't there just so much to do, no matter how you much you plan ahead?
How to make a Christmas Mini Wreath Decoration - Quick Tutorial
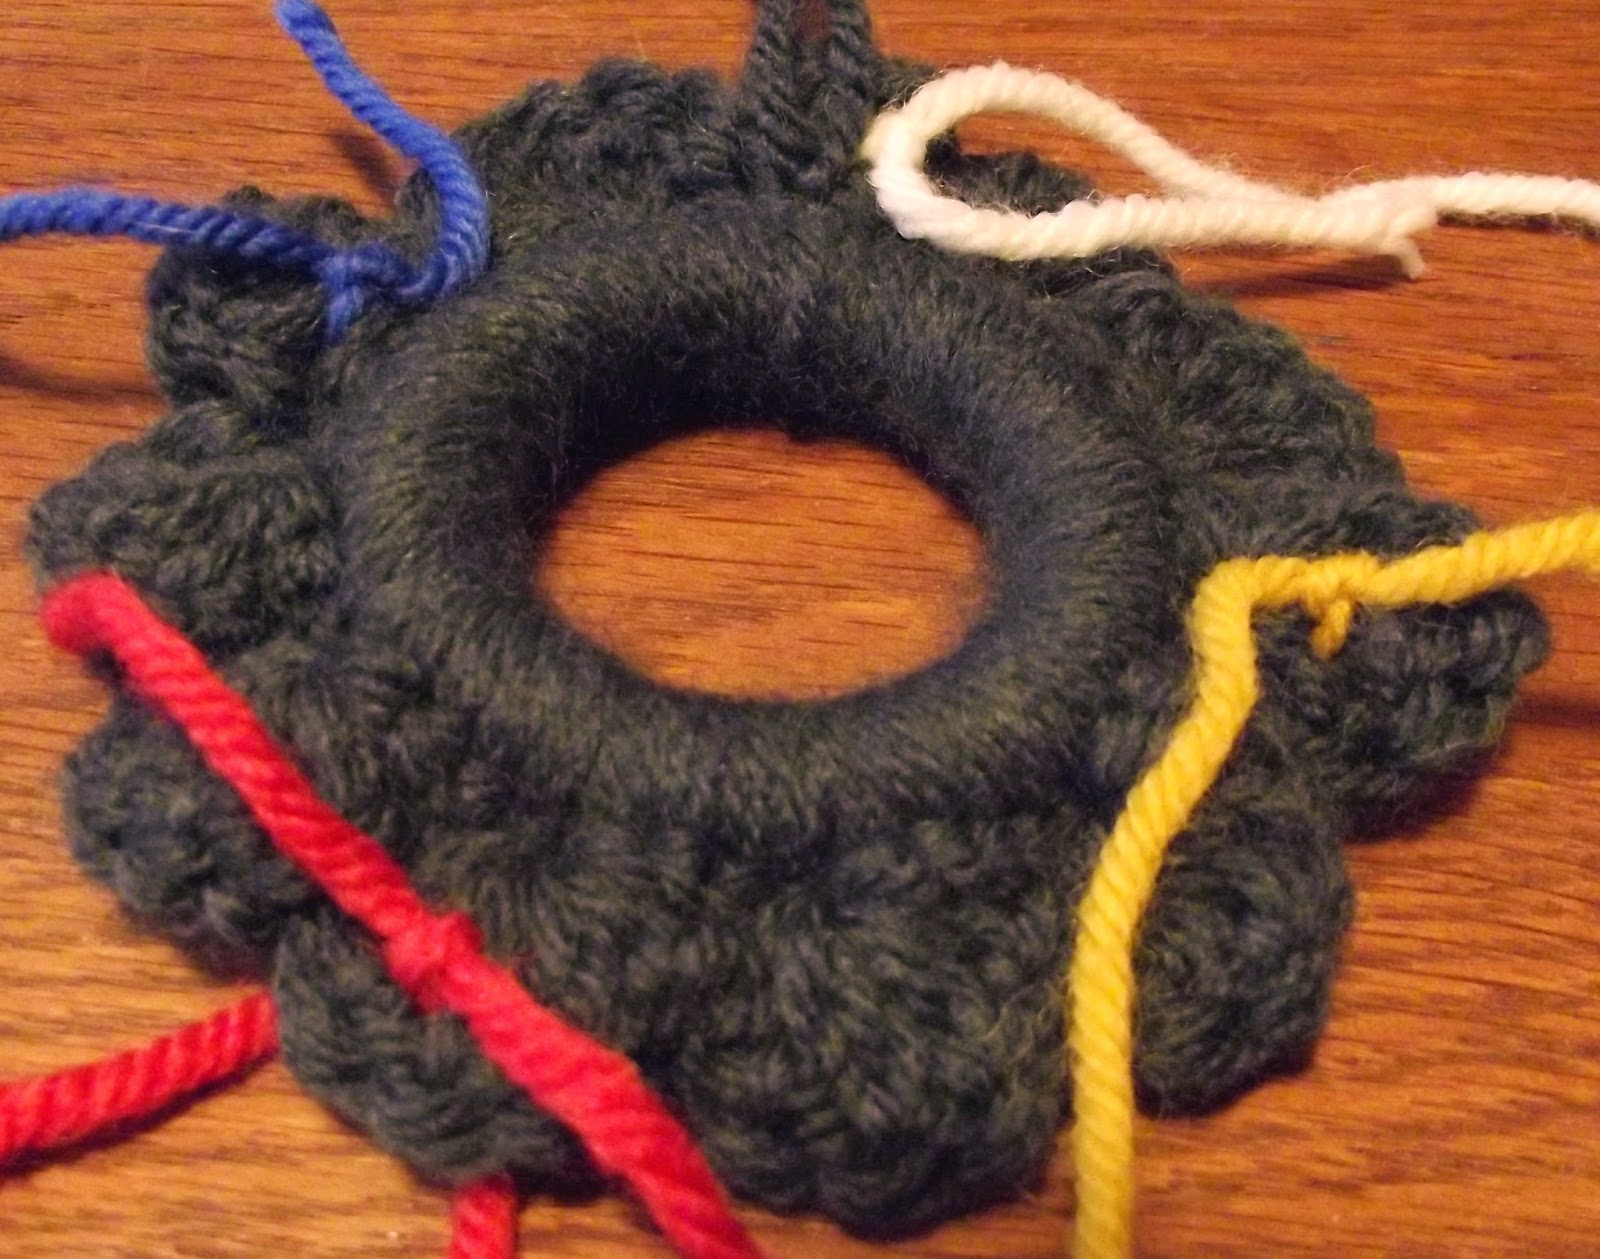
You will need a small wooden craft ring, I used one about 7cm and one of 5cm. But any kind of ring could be used (think curtain or shower curtain rings, rings from broken jewellery etc) The ring needs to be big enough so that you are able to crochet around it!
I used Scheepjeswol Stone Washed for the first example, but you could use any yarn you like, plus a matching crochet hook.
You start with leaving a long enough tail (10-15 cm), this will be used for a hanging loop later. Crochet once all around the ring, making sure you cover it tightly and completely, keep pushing the stitches so they are very close next to each other, but not overlapping. (In my case there were about 95 stitches for the larger ring).
Close the ring with a slip stitch, chain 3 (counts as first stitch) and begin the second round: *crochet (always) a total of 5 trebles into the first stitch, then a double crochet into the next stitch, then skip 3 stitches*. (Repeat from *to*)
You might find it a bit tight to crochet 5 stitches, you could also make this less, and depending on the size of your circle and number of total stitches, you could leave more stitches inbetween the trebles.
This is what it will look like:
Once you have crocheted this ruffly shell stitch all around the ring, close with a slip stitch. Cut your yarn, but leave a long enough tail. Knot the two yarn tails with each other a couple of times to secure.
Now you will need the contrasting yarn (if using) and a large wool needle to make large stitches around the outer row of shell stitch. See below:
Now we are adding a small bow. I crocheted a small number of chain stitches (here in red yarn) that would be enough to form a bow, then cut the end and pulled the yarn through the last stitch to secure.I had some nice bright Neon thread with which I sewed the shaped bow to the wreath at the bottom (opposite the 2 tail ends which are used as a hanging loop).
This is the second wreath I made. Here I used a different yarn (Veritas Laura which contains wool) and a smaller wooden ring. I needed to use a larger hook for the yarn, therefore the stitches looked much bigger in relation to the size of ring! I also needed less stitches in total. The number of stitches is not that important, obviously it helps if you can divide it by the number of stitches in a repeat (in my case above it was that the pattern repeats every 5 stitches).
Here I wanted to add some tiny crochet balls which I made by chaining 5, then closing into a ring with a slip stitch, cut the yarn and leave long ends, see photo. I used 3 different colours for the 'balls' and red for the bow.
Here you can see what it looks like at the back. All I did was to thread the 2 yarn ends through the shell stitch row in regular intervals, then knotting the yarn ends twice and then cutting them off (taking care not to cut into the knots obviously!) I also attached the bow with a small length of yarn, which I threaded through to the back and then knotted and cut.
Last step: Knot the 2 (green) yarn ends together and trim, this will be your hanging loop so you can hang the ornament
This is what the finished wreath looks like from the front.
And here you can see both wreaths together. Using different sizes, different yarns or colours can give different results. You can vary it according to your own taste. I thought it might also look nice if you got some pretty beads which you could sew on or even incorporate into your crocheting.
Use your own imagination! I would be very interested to see your own version if you try this out, just leave a link in the comments below!
 |
| Here are the finished Mini Wreaths |
 |
| Cleo and my Maybelle Flower Bunting |
Maurice Knits in Antwerpen
Recently I made a visit to a new Knit Cafe in Antwerp called
Maurice Knits. It's in a temporary location in a bank building. They even got the caravan parked outside!
To find out more about Maurice knits, visit their website:
http://www.mauriceknitwear.com/
The cafe inside is quite large and roomy with plenty of seats. When I went there there were lots of students working with their laptops! The coffee is tasty and the tart I sampled was yummy! Some of the furniture there is vintage and also for sale! There were quite a number of knitted items for sale, such as chunky winter jumpers and woolly hats! They also had a small amount of wool for sale! (Hooray for some nice Rowan yarns!) I had a nice time sitting there and crocheting some of my Christmas stars!
 |
| 11.12.14 Maurice Knits, Antwerpen |
A Christmas Market in Germany
Last Saturday we went to Hanau, Germany for a quick day trip to visit my family. After a meal, we went for a stroll across the Christmas market. In the first photo you can see some people dressed up in animal costumes which probably had something to do with the Brothers Grimm. (Hanau is the birth town of the Brothers Grimm, you can see their statue just behind the booth on the left side).
 |
| 13.12.14 Christmas Market in Hanau, Germany |
 |
| Little houses and tree ornaments |
 |
| Lots of Red and White Christmas ornaments! |
 |
| From the bottom of my heart I would like to wish you all a very Merry Christmas!!!! |
 |
| Colourful wooden toys |
New and finished projects
Here a quick mention of some other crochet and knitted makes....
I made this
crochet sample after a pattern I found here:
http://www.lionbrand.com/patterns/L0435.html?utm_source=bronto&utm_medium=email&utm_term=Crochet%20Lacy%20Scarf&utm_content=12%20Popular%20Thick%20%2026%20Quick%20Patterns%20to%20Knit%20and%20Crochet&utm_campaign=Weekly%20Stitch%2011012014
I used Fenna yarn again and I like the effect of the pattern. The idea is to transform this rectangular sample into a bag later.
 |
| 13.12.14 Crochet Stitch Sample |
 |
| Stitch Close up |
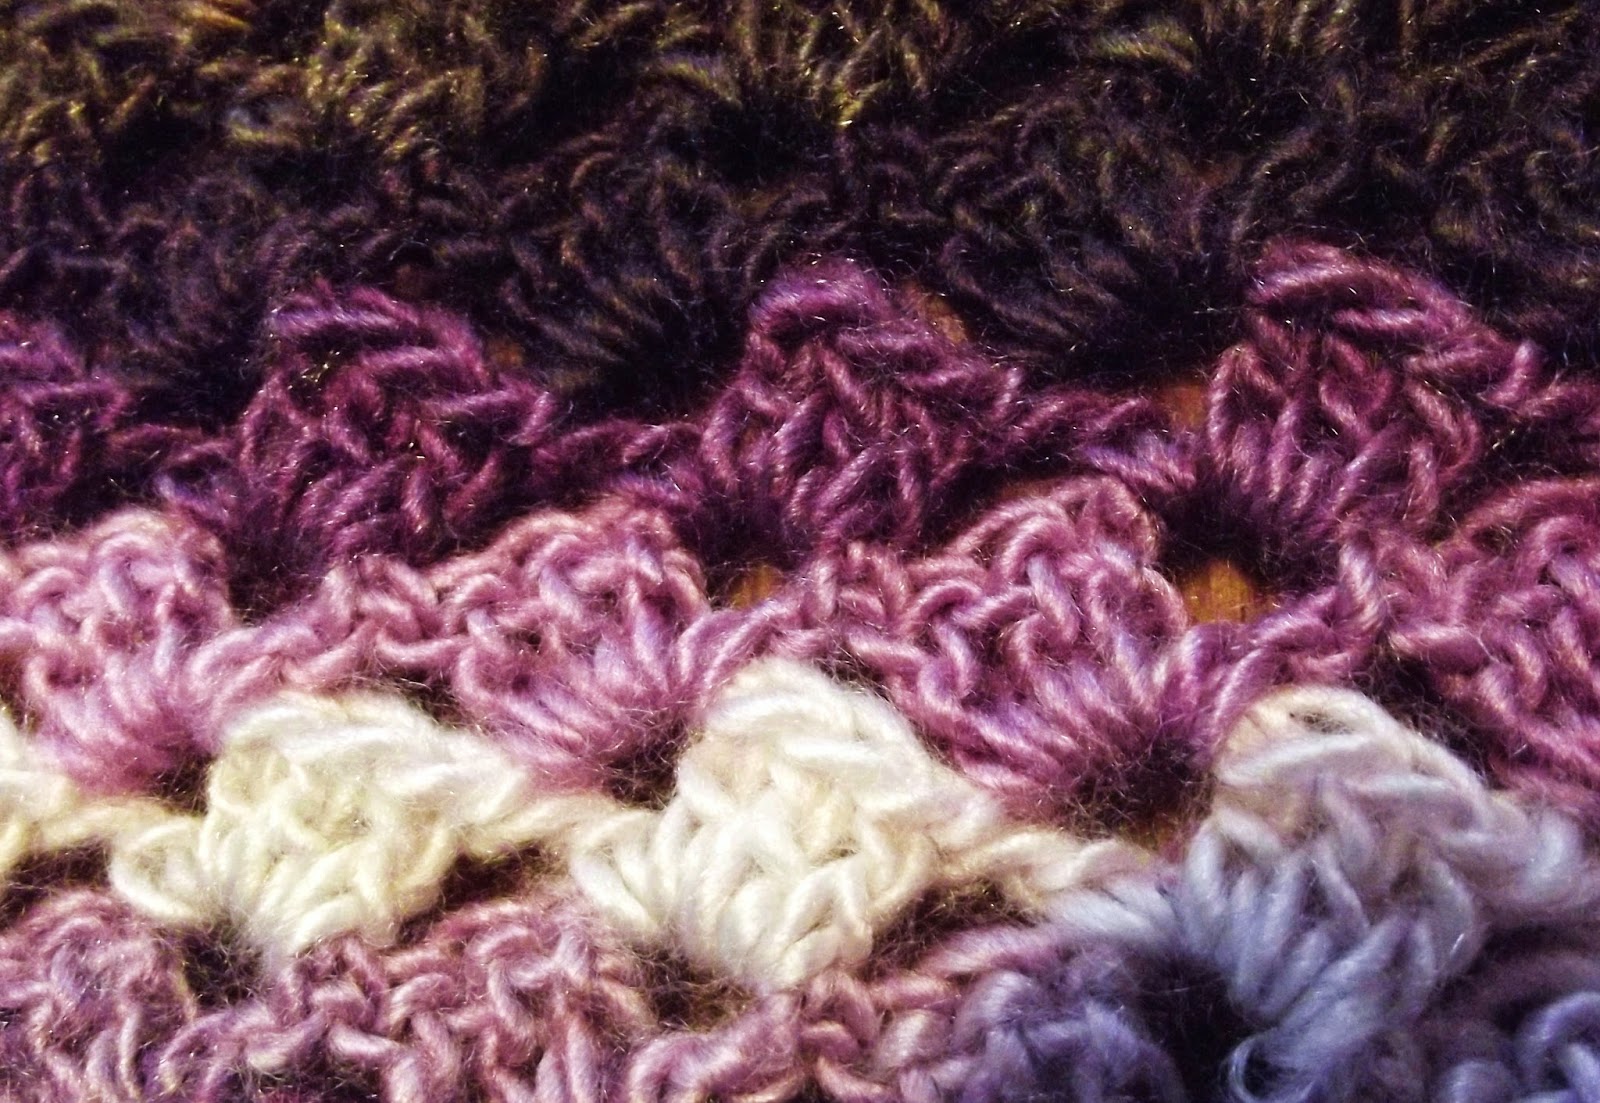
The following is my absolute favourite make of recent times! I made a large, soft
Alpaca Shawl, knitted from Drops Alpaca Boucle which can be a bit tricky to knit with thanks to the Boucle loops, but it is oh, so soft!!! It measures around 1.50m wide by about 60cm high. It is my own pattern. The effect is that the stitches create a sort of double layered pattern, thus trapping the warmth inbetween. This shawl is absolutely wonderful to wear, either with the triangle tip at the front or at the back.
I can highly recommend this yarn!!!
(I first mentioned this shawl here:
http://myfunkycrochet.blogspot.be/2014/11/blue-shells-cowl-hart-labeur-in.html )
 |
| 12.12.14 Finished Black Alpaca Shawl |
 |
| Alpaca Shawl Stitch Detail close up |
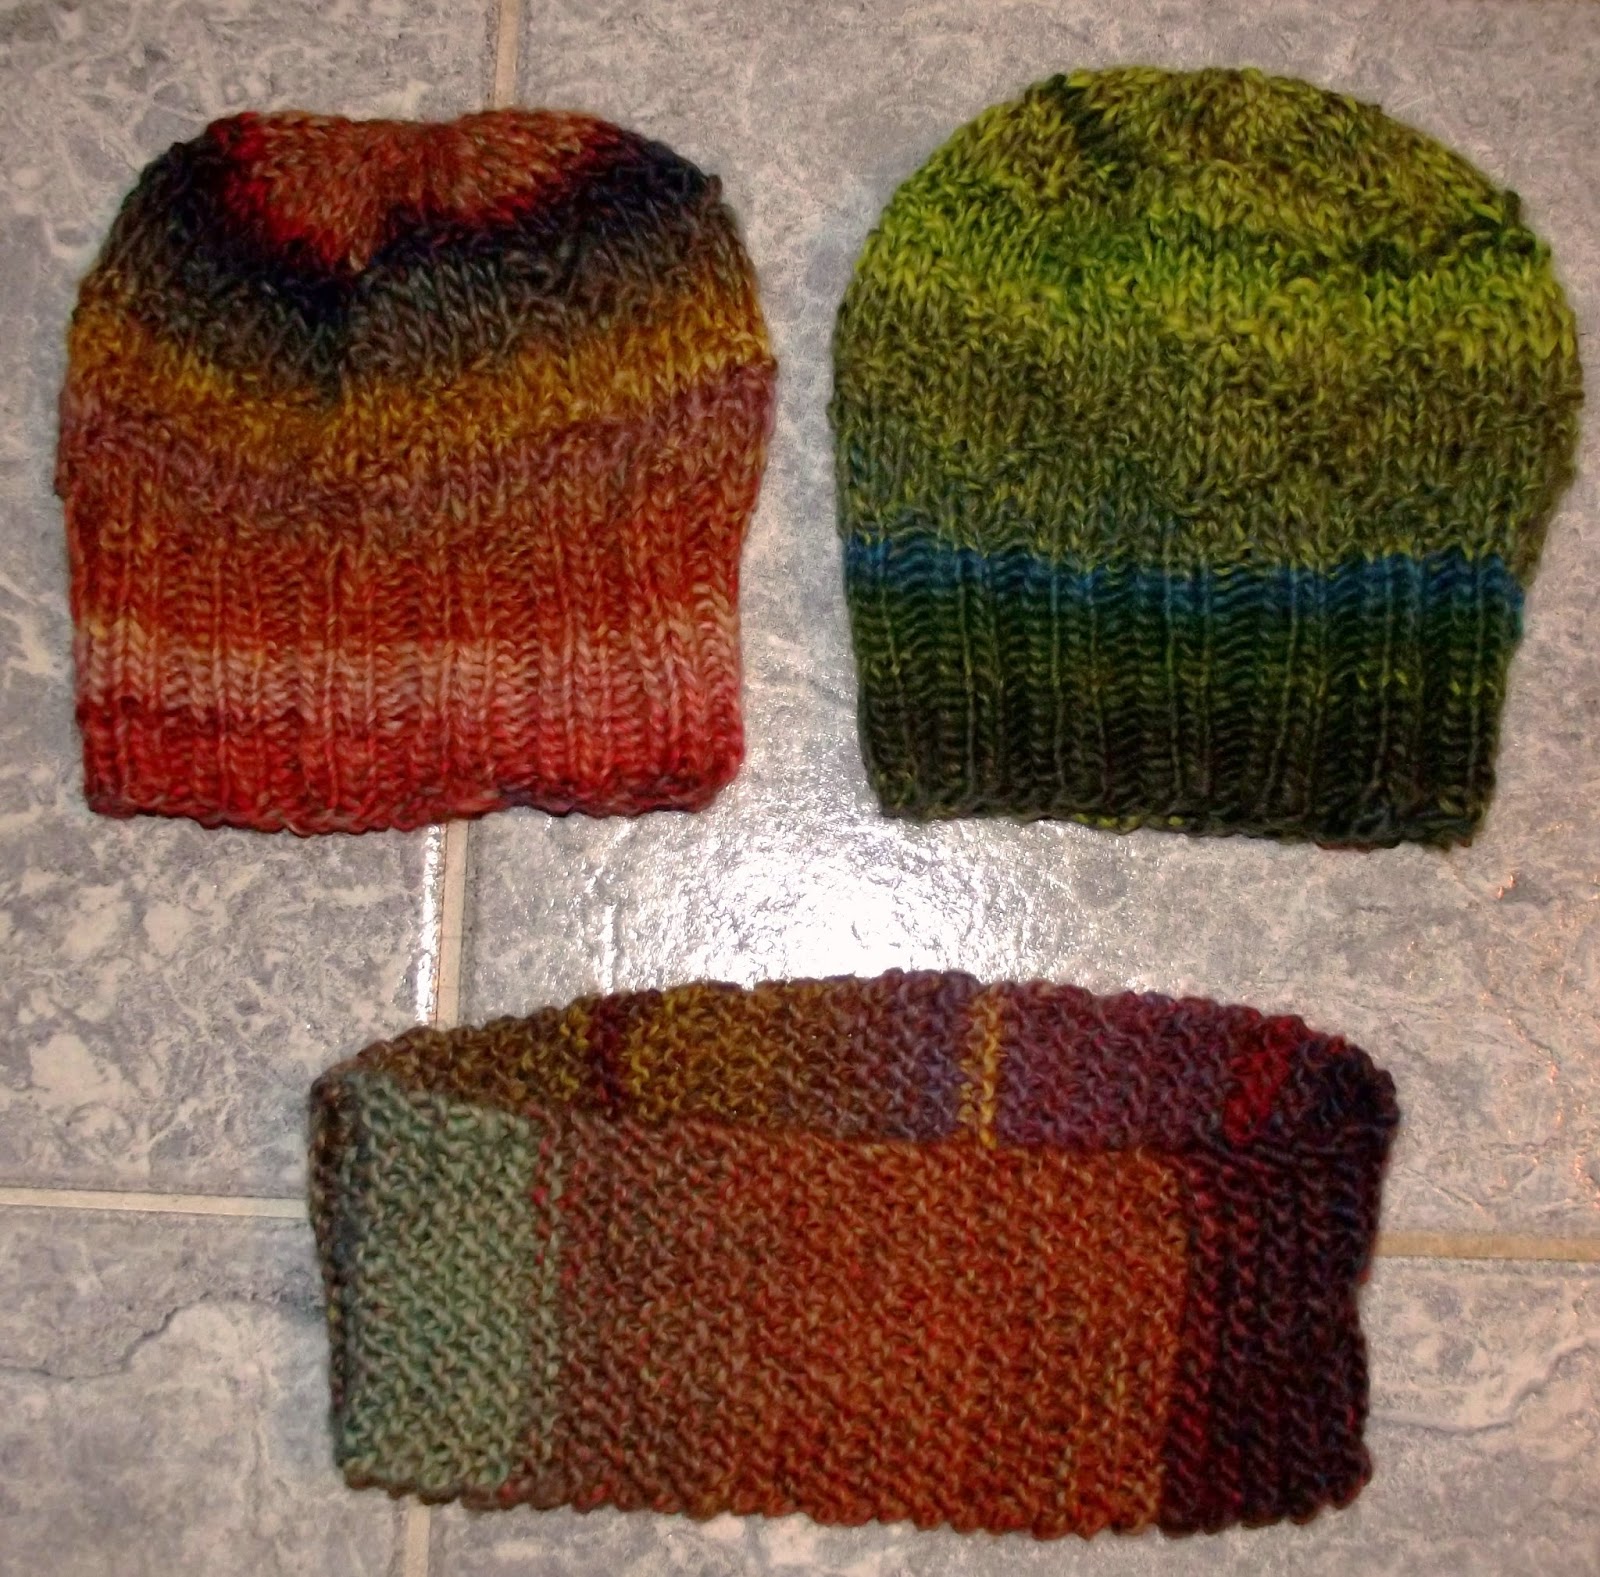
And I also knitted another
hat with the great Rico Tasai yarn, this one is a Birthday gift and has already been posted! Again, I love the range of colours!!!
 |
| 17.12.14 Knitted Hat (5) |
Here is my current WIP that I am concentrating on and that soon will be finished: I'm knitting a
cape, again from Drops Alpaca Boucle, this time in a mauve pink. I've just binge watched the Outlander series which plays in Scotland in 1743 (more about the series
here!!!)
I'm totally in love with the costumes in the series, especially all the shawls, capes, neckscarves etc that the main character Claire is wearing. Oh, and also you can find these original costume designs
here on etsy! I already got my mind on the fabulous
Sassenach Capelet! I mean, how difficult can it be???
However, my cape here is more inspired by
this. But the pattern is different, it is my own. I'm using different sized needles, starting with 8mm and currently I am down to a size 5mm.
Below you can see a new
crochet hat that I also started at the same time!
 |
| 15.12.14 Crochet Hat |
 |
| 19.12.14 Crochet Hat |
I close with these cute little
Christmas ornaments/garland that I made for last year's Christmas. Each decoration was completely handsewn. It took me quite a long time, I recall, but I loved making them!
 |
| My handsewn Xmas Garland from 2013 |
Well, that's all for now! I do hope you enjoyed reading this. Maybe you got a tiny bit of inspiration out of one or another picture, I do hope so! I want to thank you all for your kind support and loyalty, thank you for following my blog and visiting from time to time! I warmly welcome all new followers! Thanks again for all your great comments, which I enjoy reading, so please leave a little note below!
Last, not least: Here is wishing you all a wonderful Christmas!!!!